In this tutorial, you are going to learn the step-by-step
procedures on how to render a logo or signage with neon lights effect using
emissive material in VRay 3.4 for SketchUp.
SETTING UP THE SCENE AND ENVIRONMENT INSIDE THE SKETCHUP
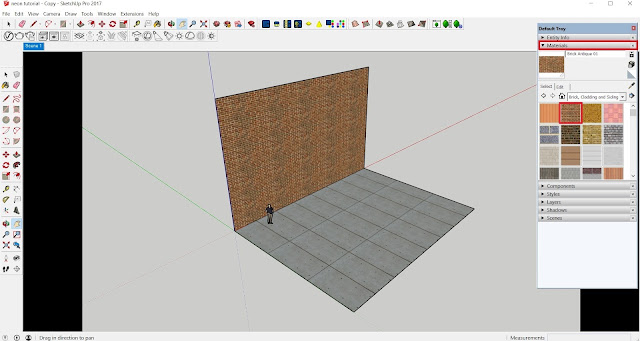 |
| STEP 1: Create a 3D model ground with wall. Apply appropriate texture in your model which can be found in SketchUp ‘Material Dialogue box’. |
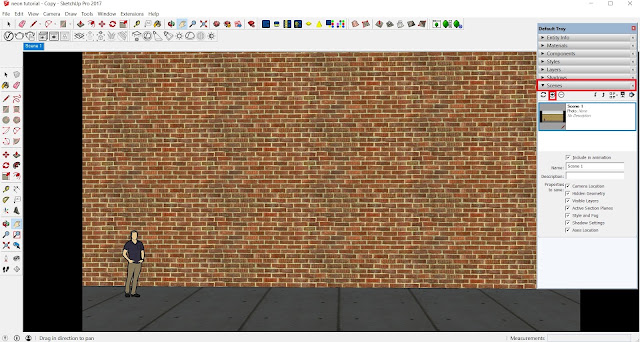 |
| STEP 2: Find appropriate view. When done, save the ‘Scene’ |
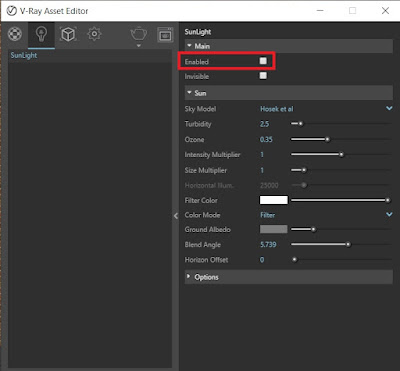 |
STEP 3: Under ‘VRay Asset Editor’> ‘Lights’> ‘Sunlight’> ‘Main’, disable the sunlight by un-checking the box.
|
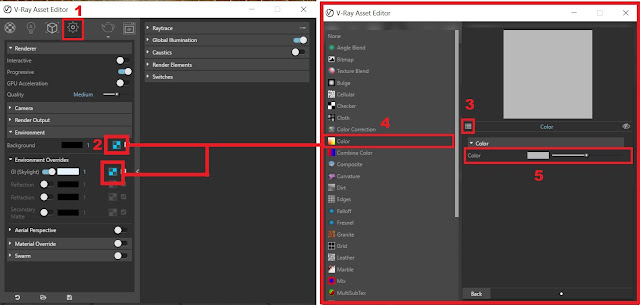 |
| STEP 4: To change the environment settings, go to ‘VRay Asset Editor’> ‘Background’, expand the selection then change the mode from ‘Sky’ to ‘Color’ setting. Change the color from black to grey. Apply the same procedure for ‘GI Skylight’. When you run a test render, the image should be dark in nature. |
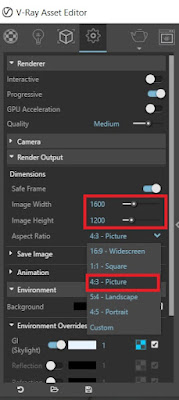 |
STEP 5: To change the dimension settings, go to ‘VRay Asset Editor’> ‘Settings’> ‘Render Output’ and change your preferred ‘Aspect Ratio’ as well as the dimension value.
MAIN TUTORIAL FOR LOGO OR SIGNAGES WITH NEON LIGHTS EFFECT
|
 |
| STEP 1: To insert image inside SketchUp, go to ‘File’> ‘Import’ |
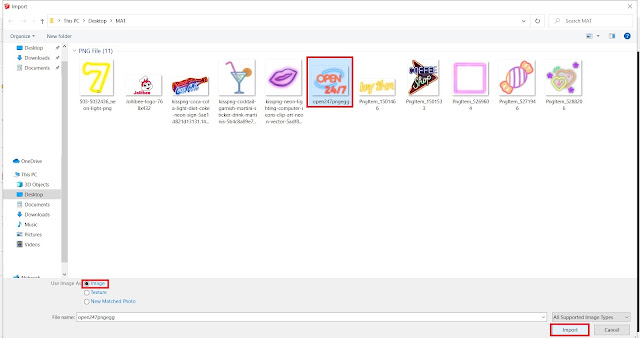 |
| STEP 2: Select your preferred PNG image. Use image as ‘Image’. When done, click ‘Import’ |
 |
Our sample of neon lights image can be downloaded in this site: click here
|
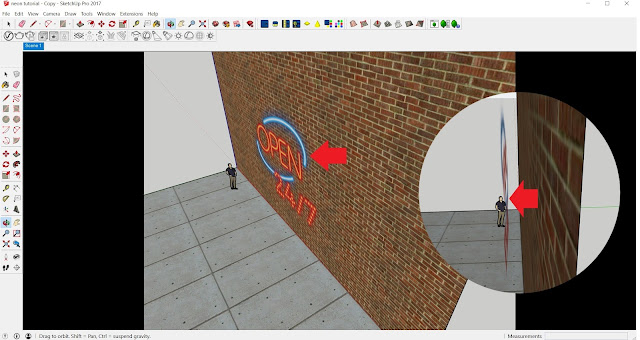 |
| STEP 3: Place the imported image near the wall. Adjust the scale of the image. Then slightly move the image away from the wall. Make sure to leave a small space between the imported image and the wall. |
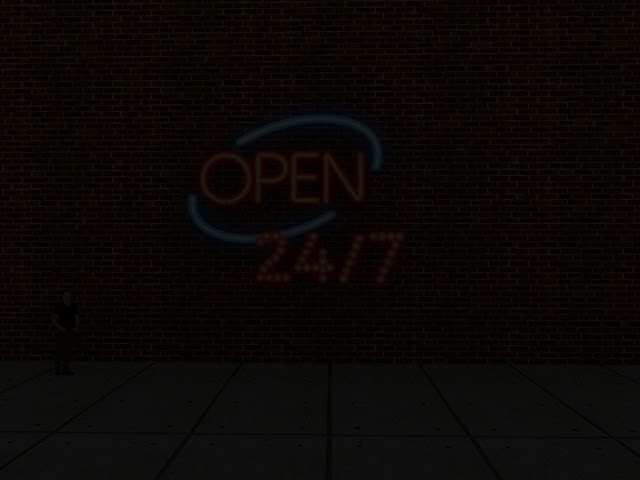 |
| If you are going to run a test render, this will be the initial result. Here, the neon logo image is not visible enough in darker environment. It’s primarily because the image has no emissive material yet. |
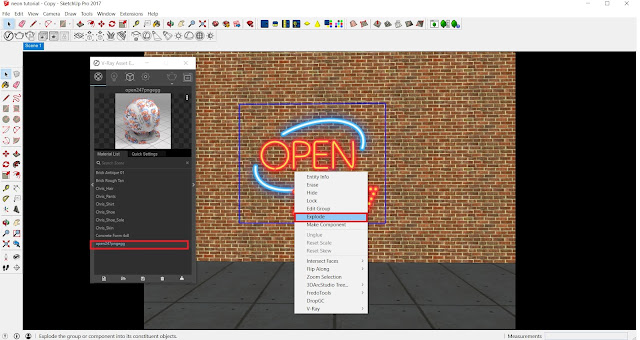 |
| STEP 4: Right click>select the imported image then choose ‘Explode’. The image will automatically register in ‘VRay materials’. When done, right click>select the image again and select ‘Group’. |
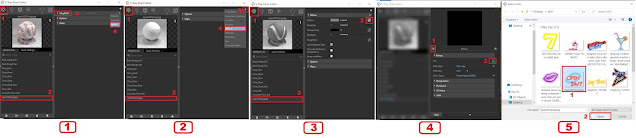 |
| STEP 5: Select the imported image texture located in the ‘VRay Materials’ and delete the VRayBRDF layer. When done, add ‘Diffuse’ layer. Click the ‘load image’ and select the neon light image, the same image we loaded before. |
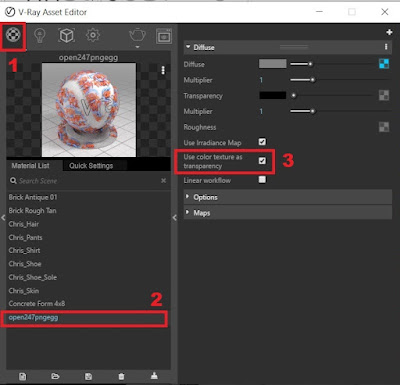 |
STEP 6: Still on the same material, check the ‘Use color texture as transparency’ to enable the transparency texture.
|
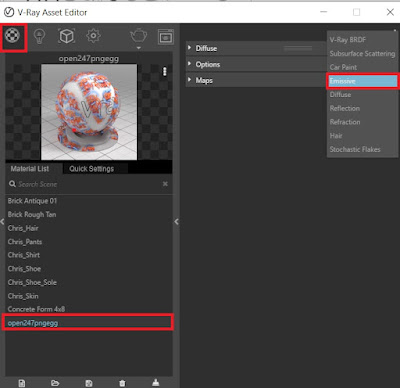 |
STEP 7: Still on the same material, add ‘Emissive layer’
|
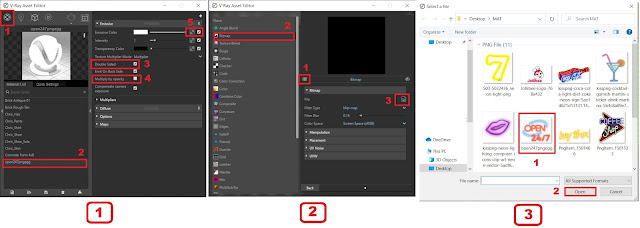 |
| STEP 8: Still on the same material, under emissive, check the ‘Double sided’ and uncheck the ‘Multiply by Opacity’. When done, load the image texture in the ‘Emissive layer’. Select the same neon light image from before. |
 |
| STEP 9: Under to ‘Emissive layer’, go to ‘Transparency color’ and change the color from black to white. When done, click the render button. |
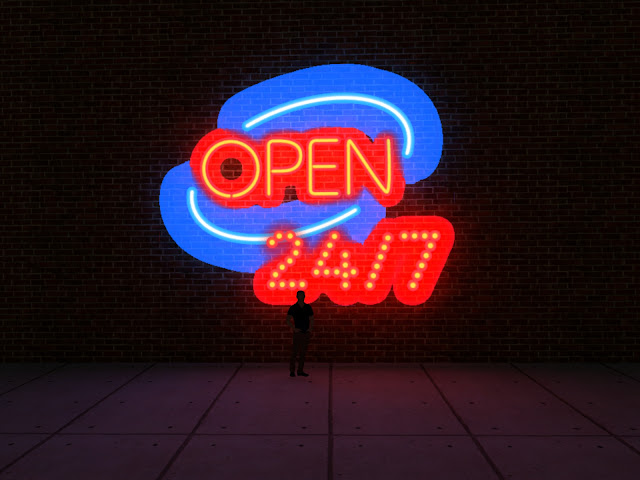 |
| Final result (Raw render) |
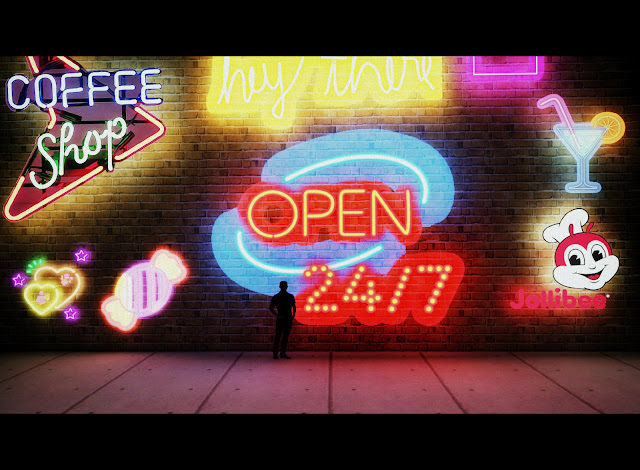 |
| Other logo and signages with neon lights effect |
Try
to apply this technique to other logo. Have fun!


Comments
Post a Comment