In this tutorial, you will learn how to render a realistic roof tile with displacement and diffuse texture using V-Ray for SketchUp.
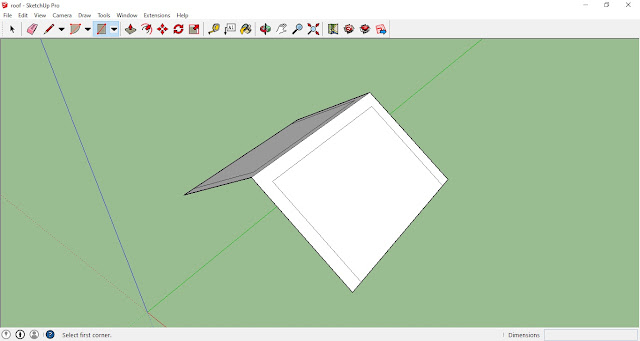 |
STEP 1: Draw a simple gable roof model in SketchUp. |
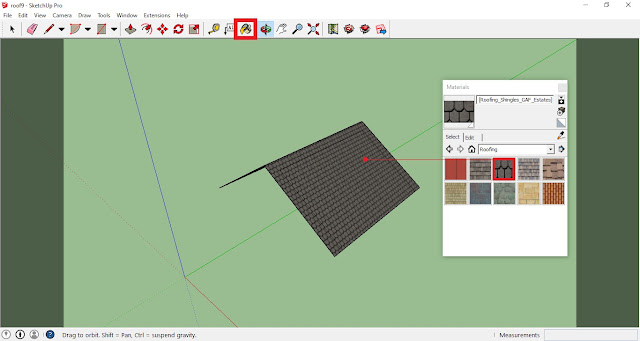 |
STEP 2: Open the SketchUp ‘Material Dialogue Box’, then go
to ‘Roofing’ selection and apply the texture to your roof model. |
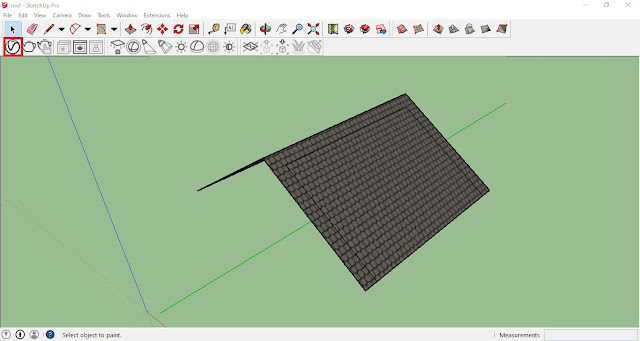 |
STEP 3: Open the ‘V-Ray Asset Editor’ |
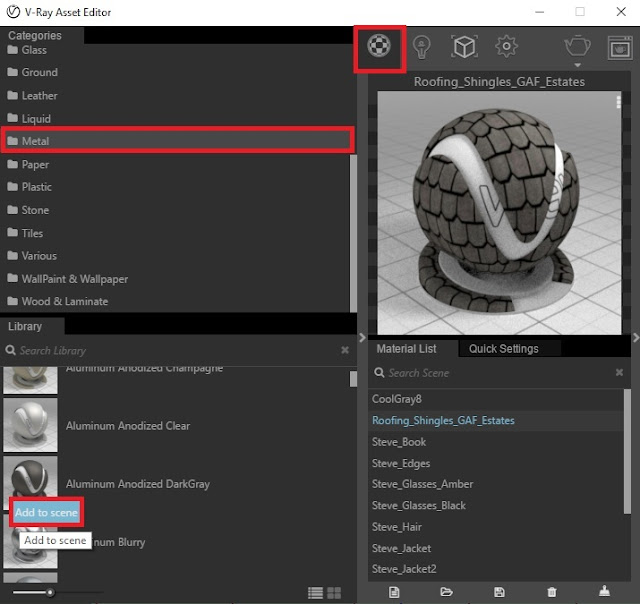 |
STEP 4: Under ‘V-Ray Asset Editor’> ‘Categories’>
‘Metal’, right click select on ‘Aluminum Anodized DarkGray’ material and click
‘Add to Scene’. |
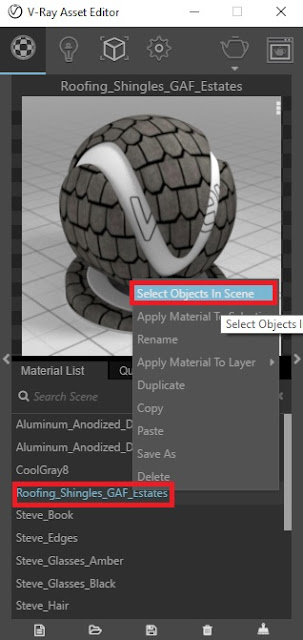 |
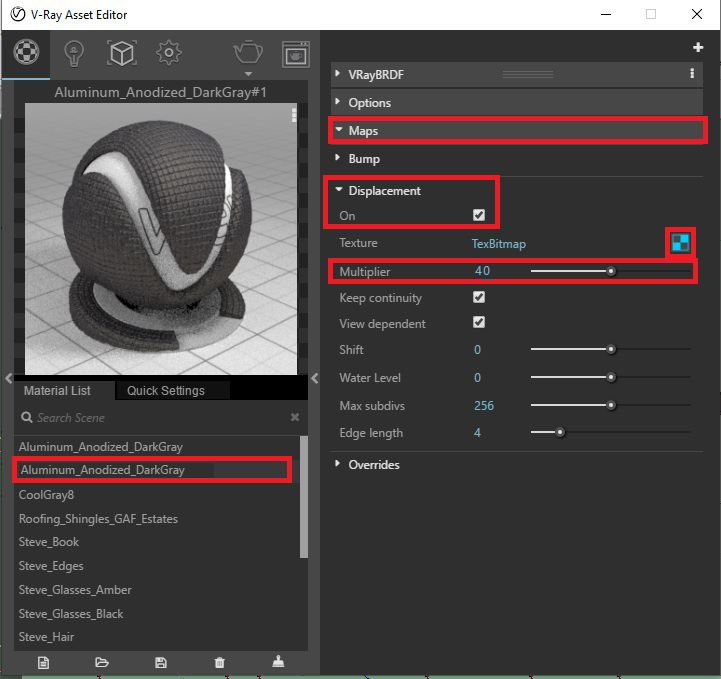
STEP 5: From ‘V-Ray Asset Editor’, right click select on
‘Roofing Shingles GAF Estates’ material and click ‘Select Object in Scene’. |
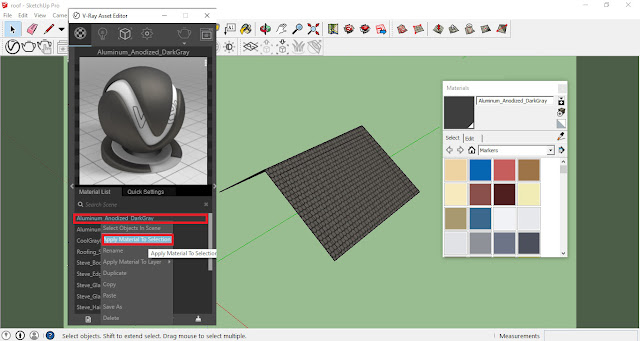 |
STEP 6: From ‘V-Ray Asset Editor’, right click select on
‘Aluminum Anodized DarkGray1’ and click ‘Apply Material To Selection’. |
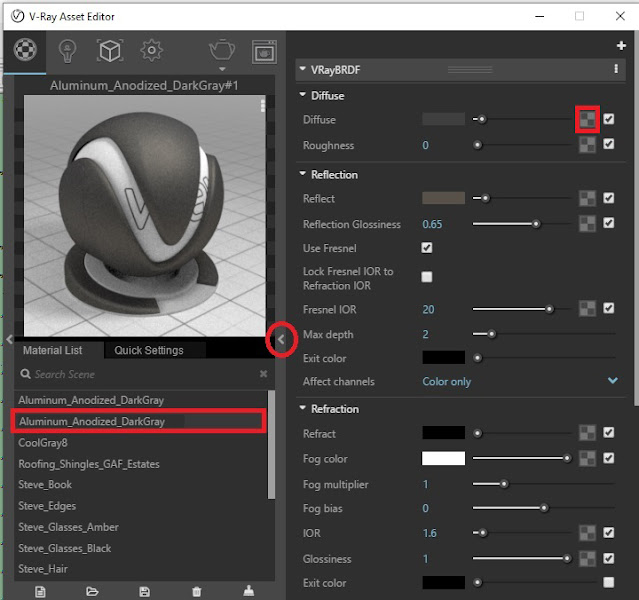 |
STEP 7: From ‘V-Ray Asset Editor’, choose the ‘Aluminum
Anodized DarkGray’ and click the ‘Diffuse’ |
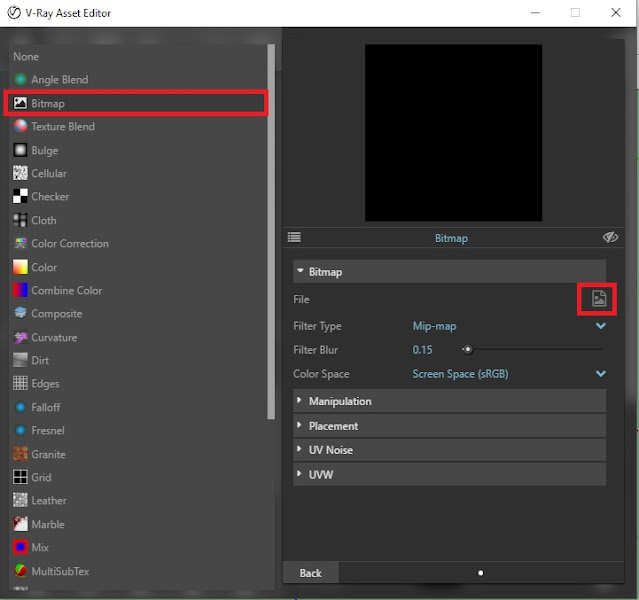 |
STEP 8: Click on ‘Bitmap’ and add File |
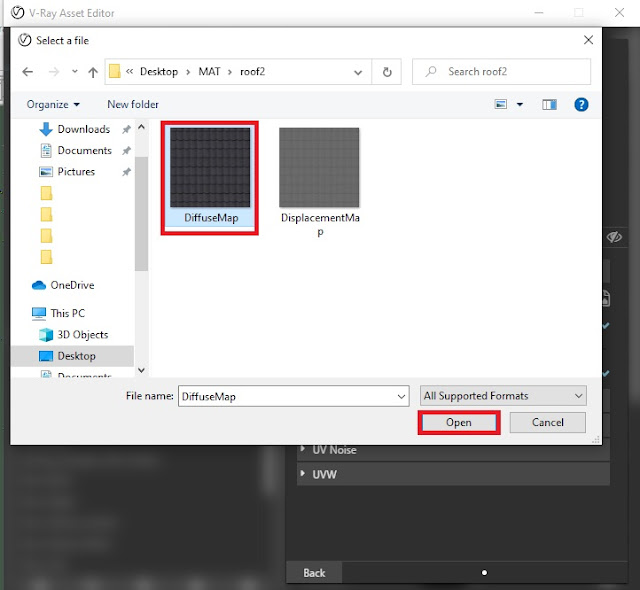 |
STEP 9: Select the diffuse texture from your folder and
click ‘Open’ |
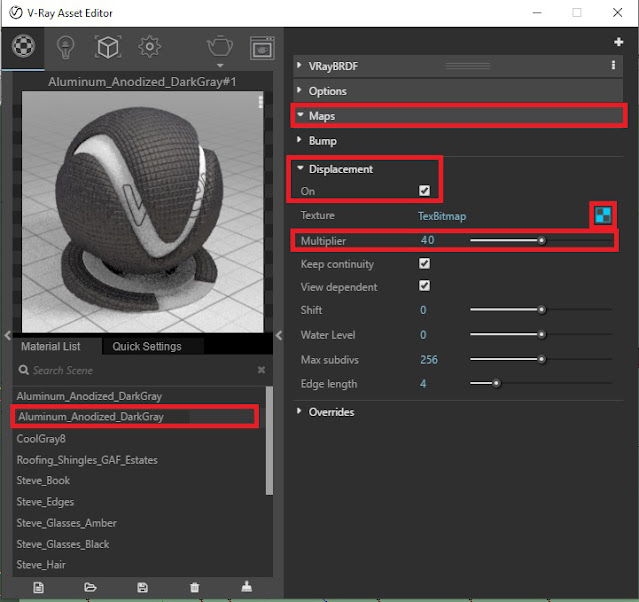 |
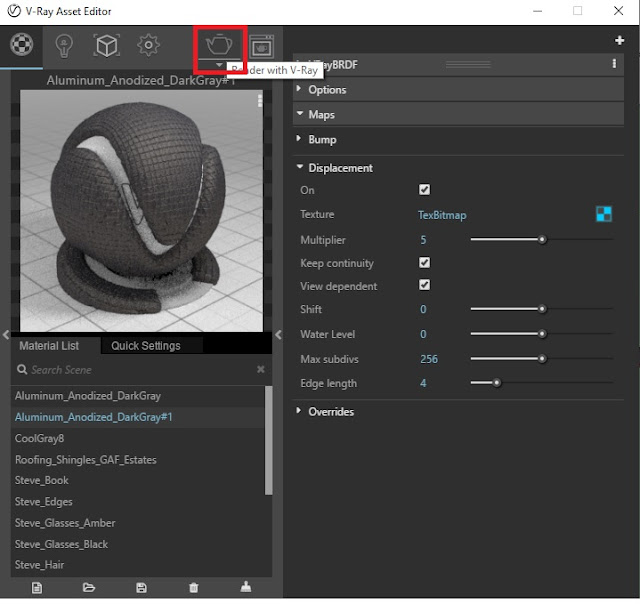
STEP 10: Under ‘Maps’ turn on the ‘Displacement, change the
value of ‘Multiplier’ to 40 and add
‘Texture’ |
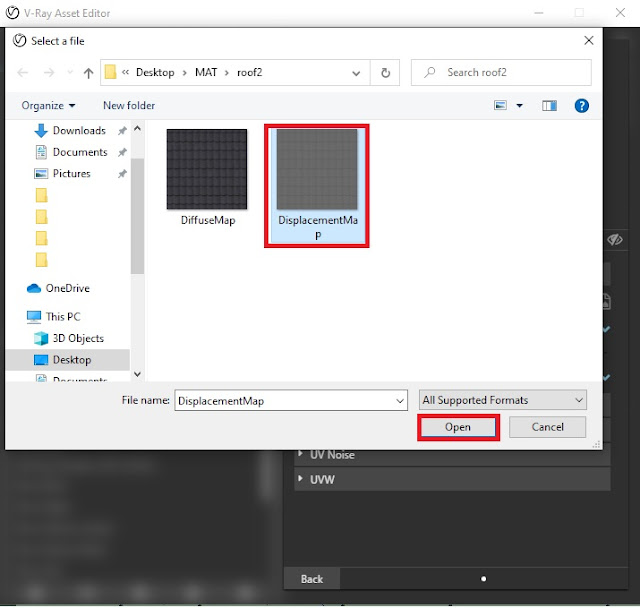 |
STEP 11: Select the displacement texture from your folder
and click ‘Open’ |
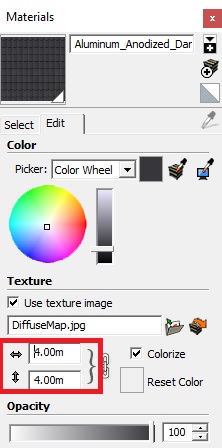 |
STEP 12: Going back to SketchUp ‘Material Dialogue Box’,
change the dimension value of ‘Aluminum Anodized DarkGray’ to match the texture
scale and the model |
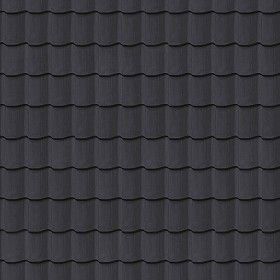 |
ROOF TILE DIFFUSE MAP TEXTURE |
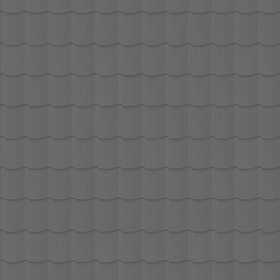 |
ROOF TILE DISPLACEMENT MAP TEXTURE |
 |
STEP 13: From ‘V-Ray Asset Editor’, click the ‘Render’ button |
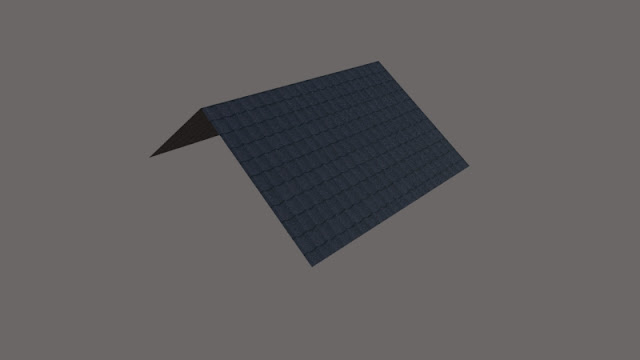 |
| Rendered
roof tile with diffuse but without displacement texture |
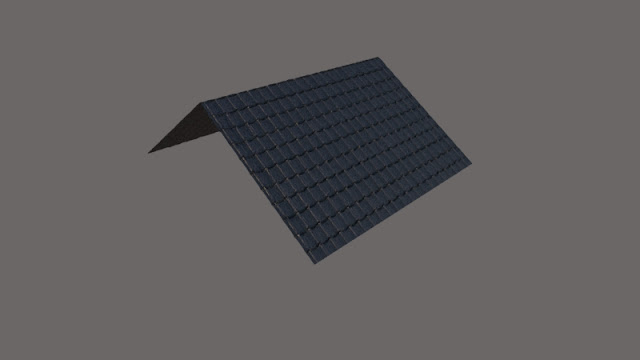 |
| Rendered
roof tile with diffuse and displacement texture |


Comments
Post a Comment