3-D Topographical Landscape (Sketch-Up Modelling Tutorial)

One of the striking changes in architectural and landscape visualization is the availability of digital applications that can generate 3-dimensional topographical and landscape forms. In effect, new visual experience emerges in capturing landscape scenery through the increasing growth of media and digital presentations.
In this tutorial, I shall provide helpful tips and tricks on how to make different 3-D geographical landscape forms using Sketchup. I will limit my tutorial discussion to five modeling procedures, which correspond to each of the following land-form models such as (1) terraces, (2) terrain/ mountains, (3) hills, (4) caves and (5) cliff. I shall use, for this tutorial, sandbox tool and Curviloft plugin as supplementary tools for Sketchup.
1. Terraces
Definition: Terraces is a piece of sloped plane that has been cut into a series of successively receding flat surfaces of platforms, which resemble steps, for the purpose of more effective farming. This type of landscaping, therefore, is called terracing. Graduated terrace steps are commonly used to farm on hilly or mountainous terrain. Terraced fields both decrease erosion and surface runoff, and may be used to support growing crops that require irrigation, such as rice.

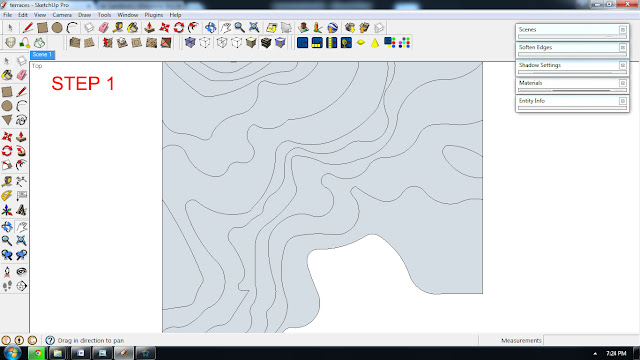
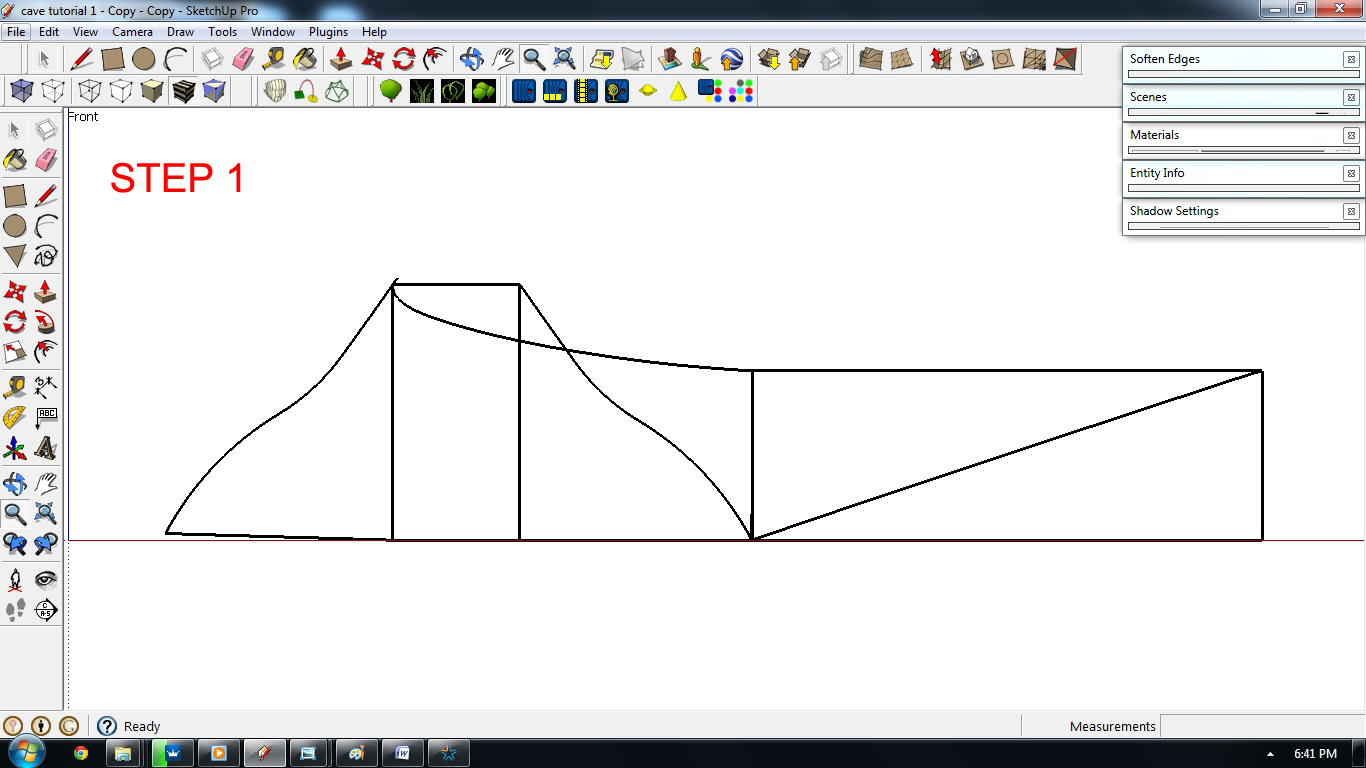
STEP 1: Draw or plot contour lines (make sure to retain all the surfaces)

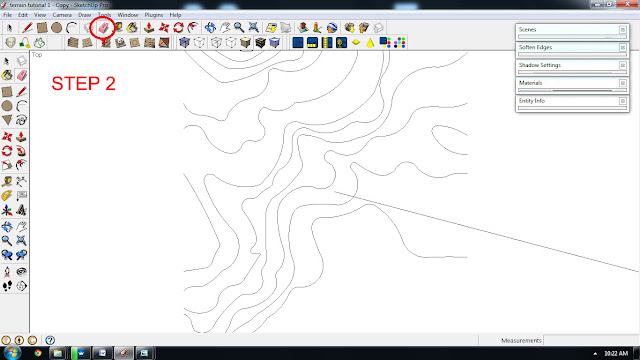
STEP 2: Select the surface

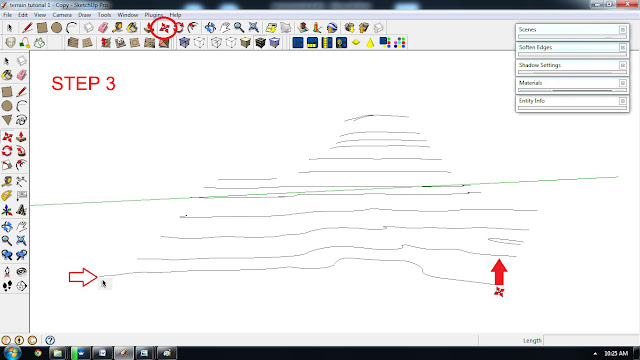
STEP 3: To adjust the elevation, use the Push/pull tool

This is the result

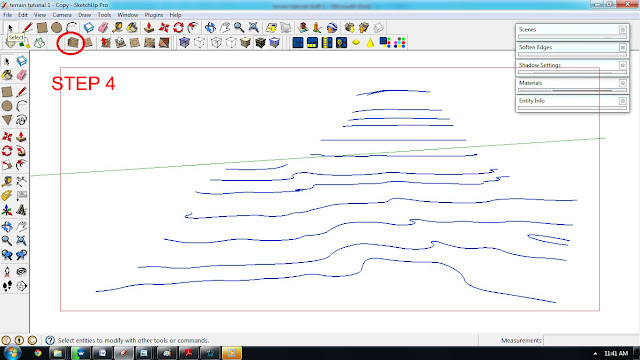
STEP 4: Erase all rough surfaces. To do that, click ctrl+ erase tool

This is the result

STEP 5: Ctrl+A (select object)> right click> “make group”

STEP 6: Apply grass texture to your group model using paint bucket. Choose any available grass textures from the Materials dialogue box.

Summary

Final Render Output

Final Render Output

Final Render Output

Final Render Output

Final Render Output
2. Mountains
Definition: A mountain is a large landform that stretches above the surrounding land in a limited area, usually in the form of a peak. A mountain is generally steeper than a hill.
STEP 1: Draw/ plot contour lines
STEP 2: Delete all faces
STEP 3: To adjust the elevation, use the Move tool. Click a specific contour line that you want to adjust> click Move tool> press the up key button (keyboard)> pull-up the selected contour line or object vertically (along the blue axis).
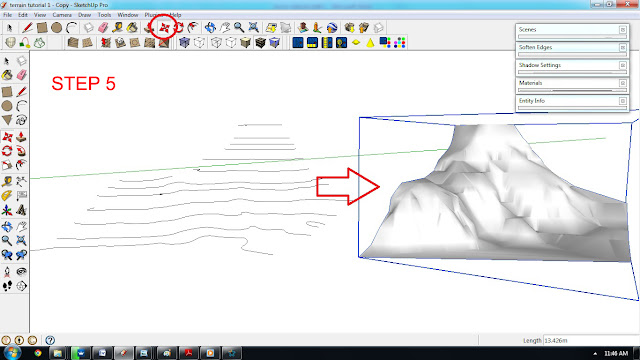
STEP 4: Ctrl+A (select object)> Using the sandbox tool, click the icon “from contours.” This process will automatically generate 3D object(s).
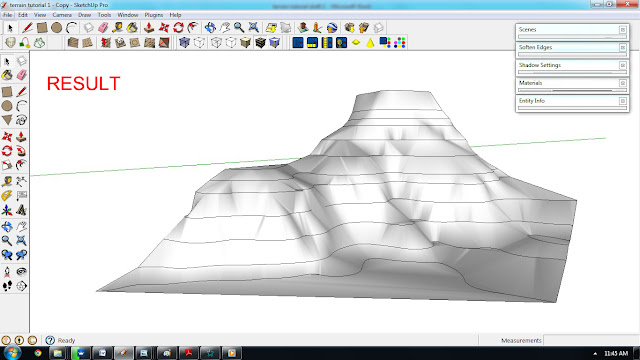
This is the result
STEP 5: Using the Move command, drag the 3D model
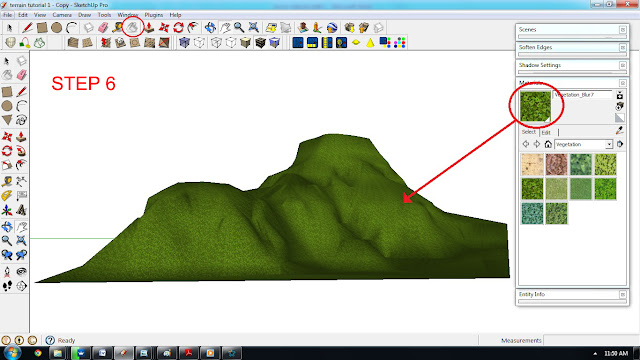
STEP 6: Apply grass texture

Summary

Final Render Output
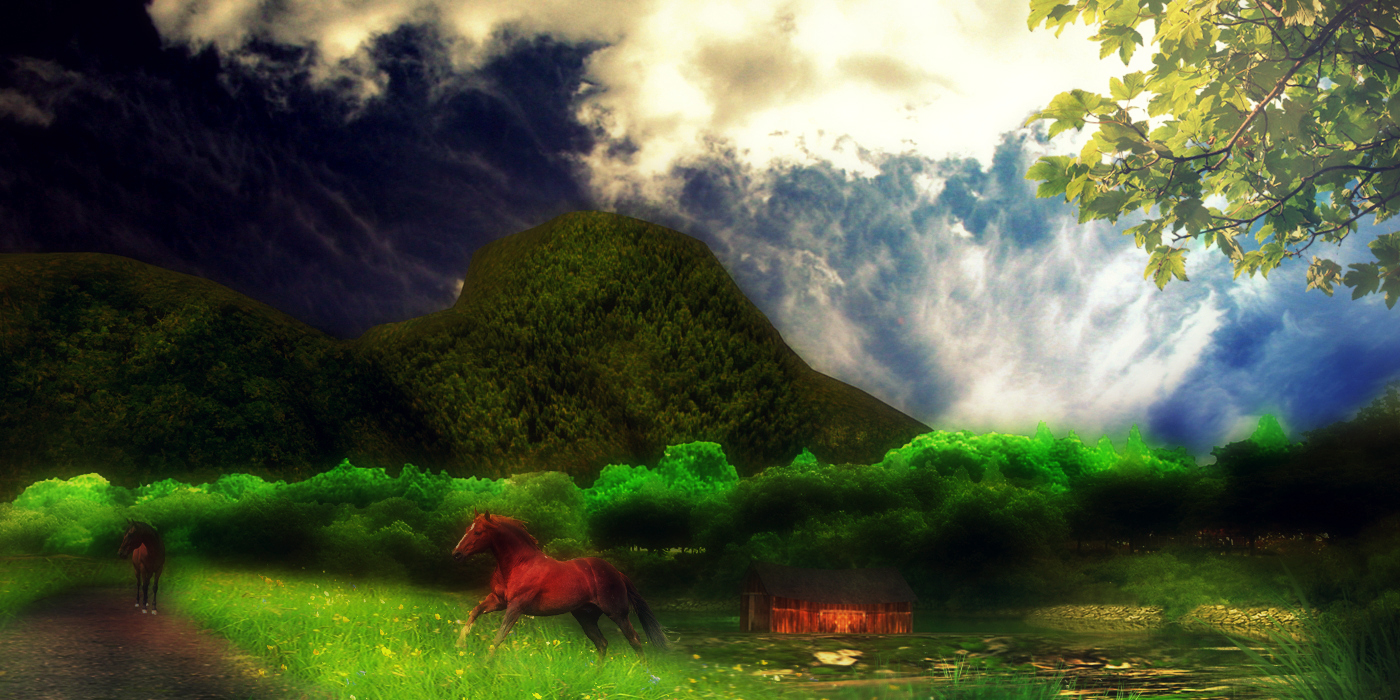
Final Render Output
3. Hills
Definition: A Hill is a landform that extends above the surrounding terrain. It often has a distinct summit, although in areas with scarp/dip topography a hill may refer to a particular section of flat terrain without a massive summit.

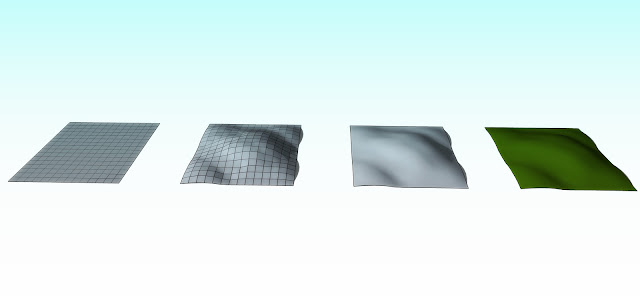
STEP 1: Using the sandbox tool, click the icon “From scratch”> start to draw the grid lines horizontally.

STEP 2: Double click the grid box (group), and then select certain area (spaces or corners) that you want to Smoove.

STEP 3: To adjust the surface elevation, click the smoove icon> pull-up or pull-down the selected surface.

This is the result

STEP 4: To remove the grid and rough edges from the model, use the “Soften edges” tool. Select Window pulldown menu> click “Soften edges.” Double click the group model> make the following changes in the “Soften edges” settings: 180/ check smooth normal/ check soften coplanar.

STEP 5: Apply grass texture to the model
Summary

Final Render Output

Final Render Output
4. Caves
Definition: A cave is a hollow place in the ground, especially a natural underground space large enough for a human to enter. Caves form naturally by the weathering of rock and often extend deep underground. The word cave can also refer to much smaller openings such as sea caves, rock shelters and grottos.
STEP 1: Draw curve lines showing concave/ convex line patterns (make sure that all lines are connected)

STEP 2: Ctrl+A (select object)> Using the Curviloft plugin, click the icon “Skinning of shapes”

STEP 3: Click the check sign. This process will automatically generate 3D object(s).

STEP 4: Using the Move command, drag the 3D model

STEP 5: Double click the group model> Delete the selected surface. Using “Rectangle” tool, make a ground surface.

STEP 6: Apply mossy-stone or rock texture on the model

Summary

Final Render Output
5. Cliff
Definition: A cliff is a vertical, rock exposure. Cliffs are formed as erosion landforms due to the process of erosion and weathering that produce them.

STEP 1: Draw/ plot contour lines. Draw a straight line (parallel to the contour lines)> delete all faces

STEP 2: To adjust the elevation, use the Move tool. Click a specific contour line that you want to adjust> click Move tool> press the up key button (keyboard)> pull-up the selected contour line or object vertically (along the blue axis). The long straight line should be leveled along the peak contour line.

STEP 3: Ctrl+A (select object)> Using the sandbox tool, click the icon “from contours.” This process will automatically generate 3D object(s).

This is the result

STEP 4: Using the Move command, drag the 3D model

STEP 5: Apply grass texture on top and rock texture on side

Summary

Final Render Output
Comments
Post a Comment