In this tutorial, you will learn
how to render wet paving or puddle road image in V-Ray 3.4 for SketchUp. This
particular render technique is applicable for rainy scene, sunset view scene or night scene with strong vibrancy of colored street lights or car lights reflected on wet paving. For this tutorial, I would
like to render a roof parking area with wet paving for demonstration purposes.
SETTING UP YOUR BACKGROUND
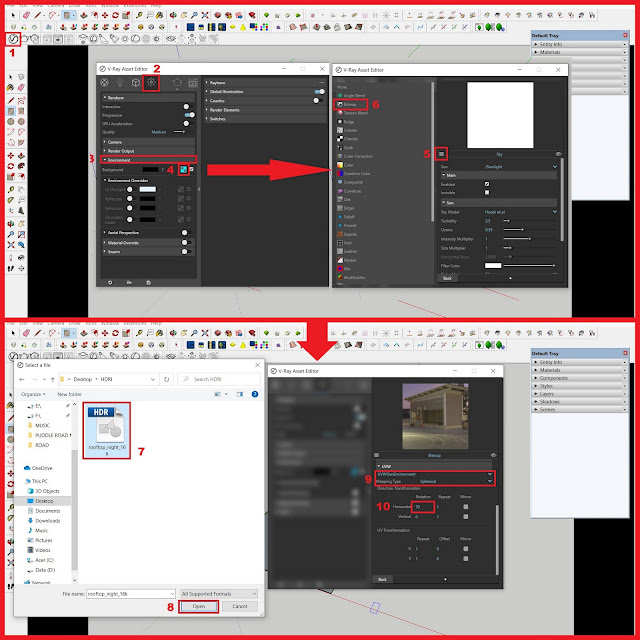 |
STEP 1: Set-up your background
scene by adding HDRI. Here, I used the HDRI ‘Rooftop Night’ from ‘HDRI Haven’.
Follow the setting for adding HDRI in the scene. Go to’ VRay Asset Editor’>
‘Settings’> ’Environment’> ’Background’> change the value of
‘background’ to 20> expand the option selection> select ‘Bitmap’> then
load your HDRI> under ‘UW’ change the setting from UVWGenChannel to
UVWGenEnvironment> under the ‘Mapping Spherical type’ change the value of
horizontal rotation based on your preferred angle view. |
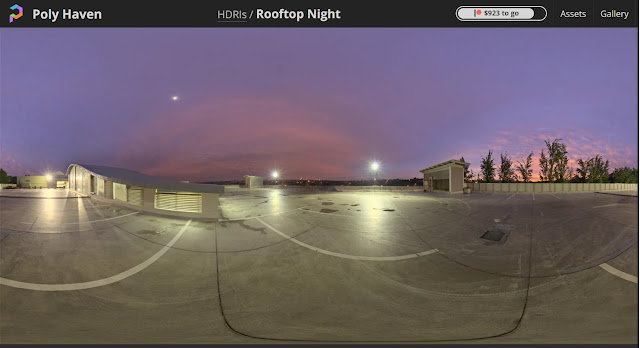 |
HDRI ‘Rooftop Night’ preview from
HDRI Haven |
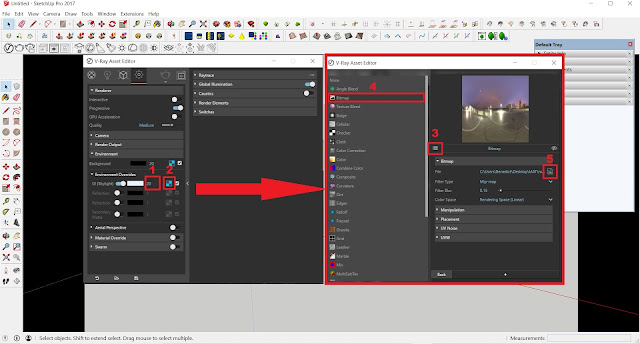 |
STEP 2: Still in the HDRI settings,
Change the value of ‘GI (Skylight)’ to 20. Then expand the ‘Environment
Overrides’> enable the ‘GI (Skylight)’> click the loading option>
select the ‘Bitmap’> then choose your preferred HDRI. |
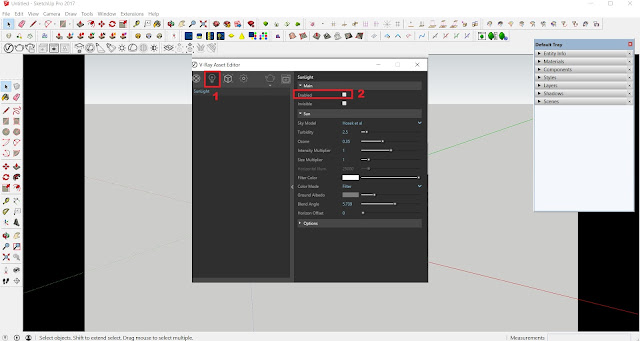 |
STEP 3: Go to ‘Lights’ and
disable the ‘Sunlight’. We don’t want our HDRI to be overpowered by the VRay
Skylight when we proceed to rendering. |
SETTING UP YOUR MODEL
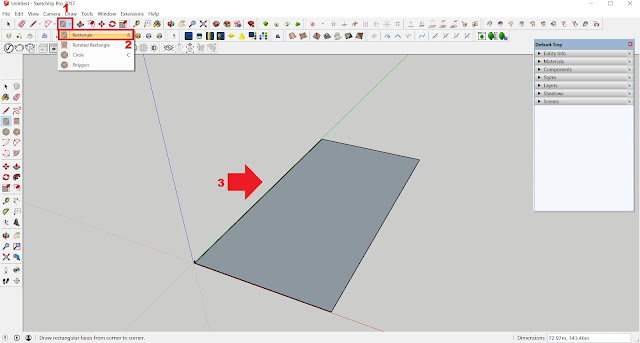 |
STEP 1: Set-up your SketchUp
scene by adding a plane surface. Under ‘Shapes’>’Rectangle’, draw a plane
surface. Later, during the render
process, this will serves as a base for wet paving texture, rendered using VRay
3.4 |
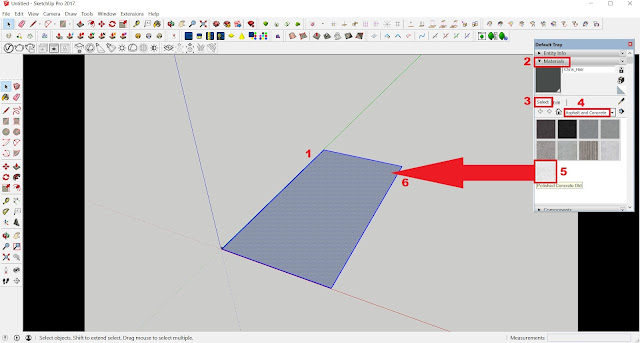 |
STEP 2: Select the plane surface
model, using the SketchUp ‘Material tool box’ select and apply concrete
material to the model. |
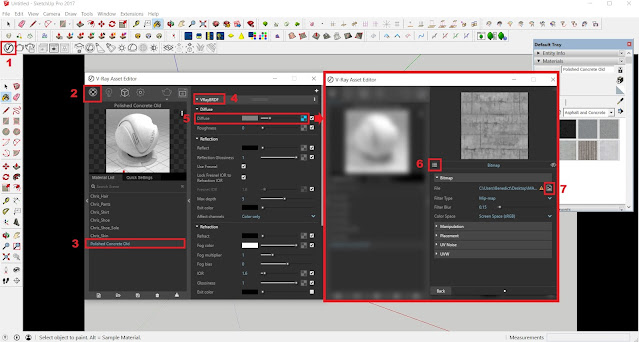 |
STEP 3: Go to VRay ‘Asset
Editor> ‘Materials’ and select the material you applied to your plane model
which is the ‘polished concrete old’. Under ‘VRayBRDF’, go to ‘Diffuse’ and
click the ‘load image'. Under ‘Bitmap’> ‘File’ click the ‘Open file’ icon
then select a more realistic concrete texture. If necessary, go to SketchUp
‘Material Dialogue box’> ‘Edit’> change the dimension value. |
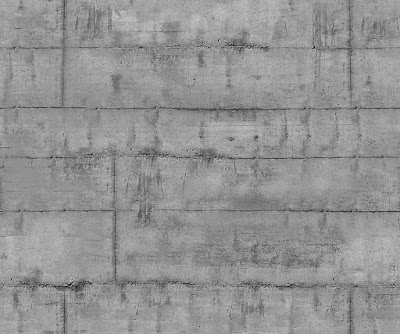 |
Concrete texture from istockphoto |
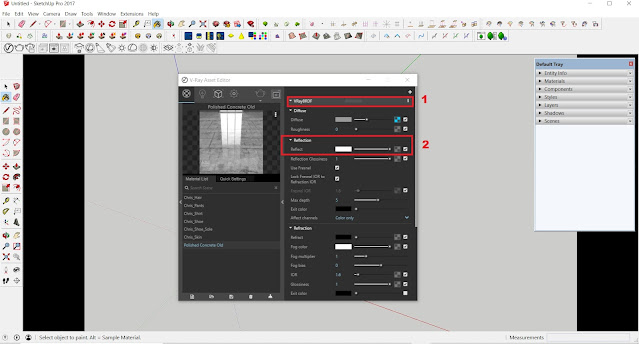 |
STEP 4: Under ‘VRayBRDF’, go to
‘Reflection’ and change to color surface from black to white by extending the level. |
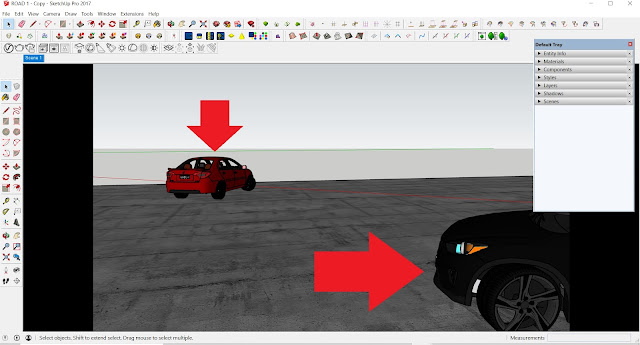 |
STEP 5: For entourage, add 3-D
cars to the scene. The 3D cars are available in 3D warehouse. |
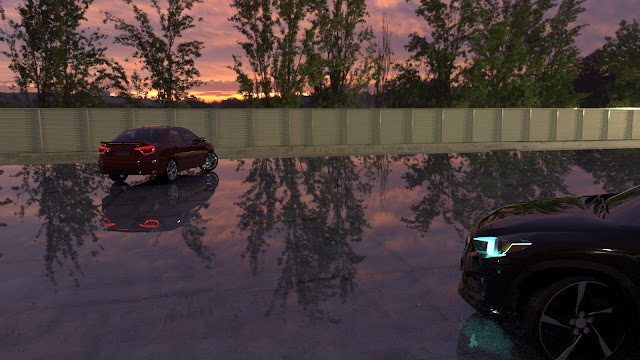 |
Test Render: Find an appropriate
view and save the scene. Run a test render. As you can see the reflection of
the concrete paving is very strong. Hence, we are going to add reflection
glossiness with appropriate texture. |
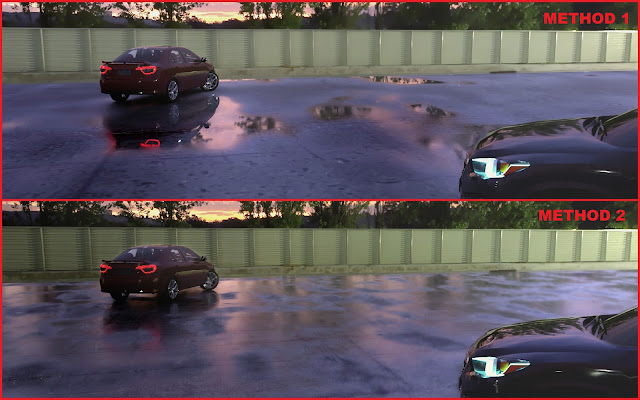
METHOD 1 (adding puddle road map using BITMAP)
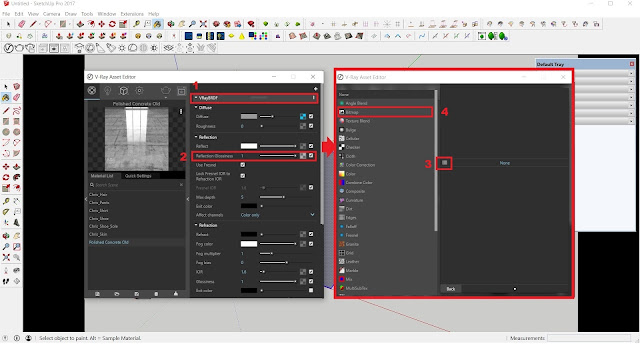 |
| STEP 1: Under ‘VRayBRDF’, go to ‘Reflection Glossiness’ then click the ‘load image’ icon. Expand the loading selection and select ‘Bitmap. |
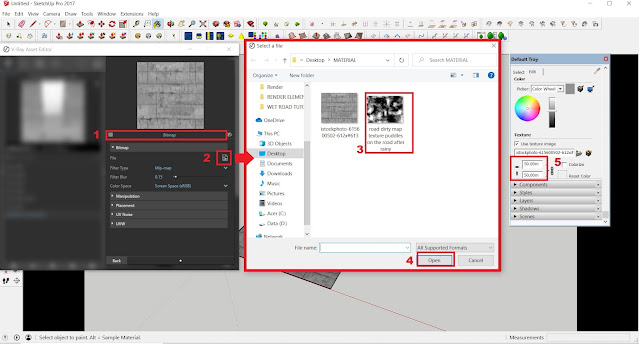 |
STEP 2: Select the appropriate
map texture available in the folder. Here, we will be using the puddle road
map. During the rendering process, in order to visibly notice the puddle road map, you have to change the size of the diffuse texture in SketchUp. Here, go to SketchUp ‘Material
Dialogue box’ and change the dimension size of the concrete texture by increasing the value. Here, the
size of the puddle road map from the 'Reflection Glossiness' is relative to the diffuse texture (concrete paving texture) from the SketchUp model. When done,
click the render button for test render. |
 |
Sample map texture ‘Puddles road
map’ |
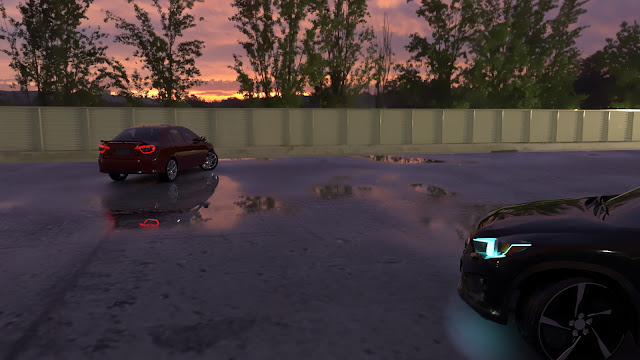 |
Result so far using BITMAP |
METHOD 2 (adding puddle road map using FALLOFF)
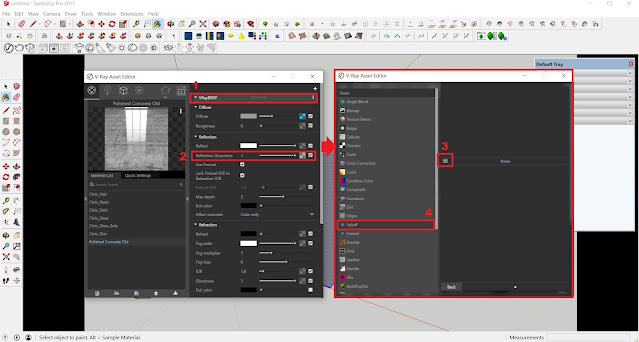 |
STEP 1: Under ‘VRayBRDF’, go to
‘Reflection Glossiness’ then click the ‘load image’ icon. Expand the loading
selection and select ‘Falloff’ |
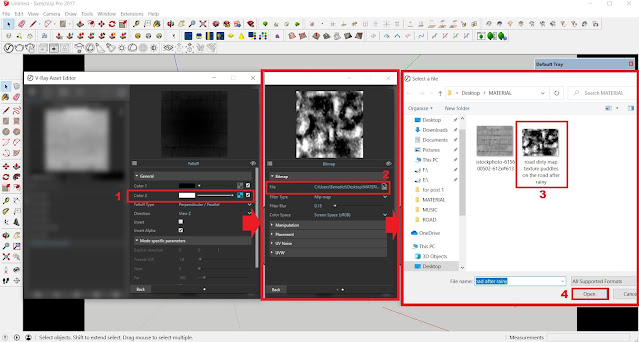 |
STEP 2: Under ‘Falloff’>
‘General’> ‘Color 2’, click the ‘load image’. Click the ‘Bitmap’ and select
the appropriate map texture available in the folder. Here, we will be using the
puddle road map. |
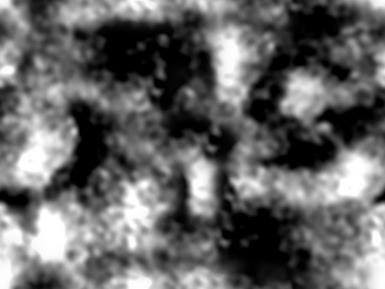 |
Sample map texture ‘Puddles road
map’ |
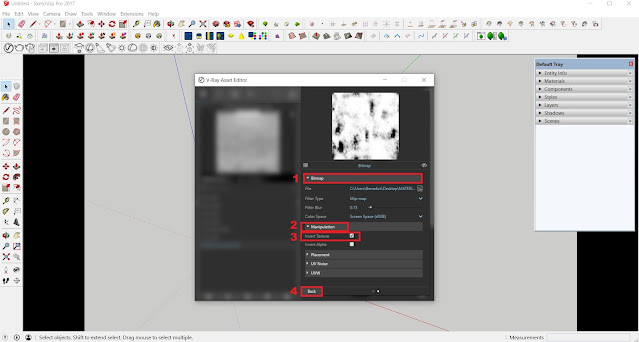 |
STEP 3: Still on the ‘Bitmap’,
under ‘Manipulation’, check the ‘Invert texture’. When done, click ‘back’. |
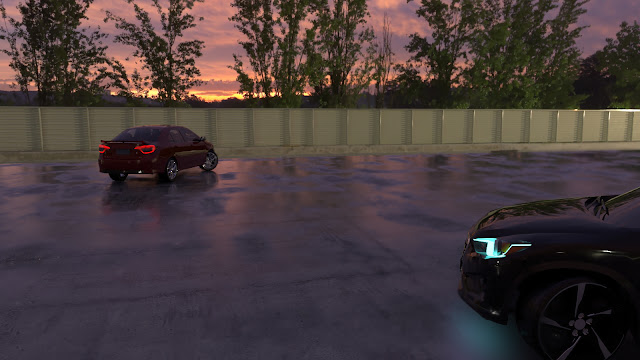 |
Result so far using FALLOFF |
RENDER SETTINGS
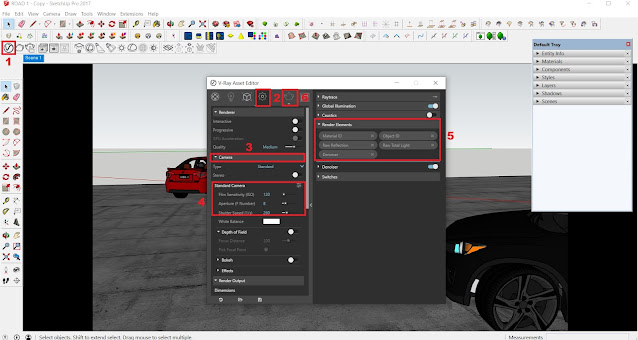 |
| STEP 1: Under VRay ‘Settings’> “Camera’, change the parameters for ‘Standard camera’ with the following value: (1) Film Sensitivity (ISO) from 100 to 120, Aperture (F number from 8 to 7, Shutter speed (1/s) from 300 to 260. To enhance your render image during post-production, add appropriate render elements for the scene such as denoiser, raw reflection, raw total light, Material ID, and Object ID. When done, click the render button. |
 |
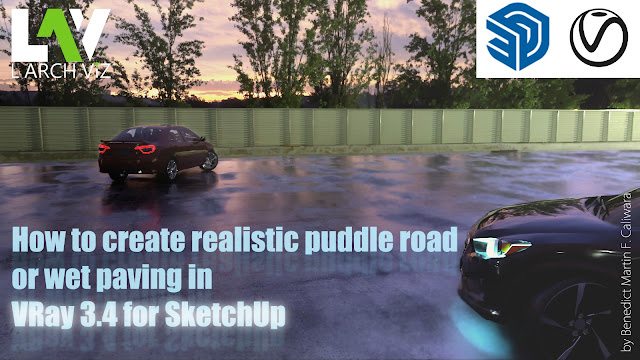
Final Render Image with render
elements |
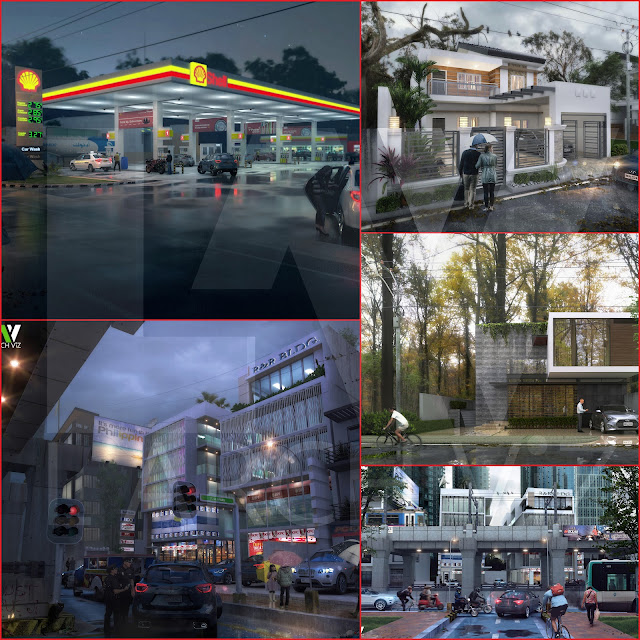 |
My other works with wet paving or
puddle road |
THANK YOU FOR READING!




Comments
Post a Comment