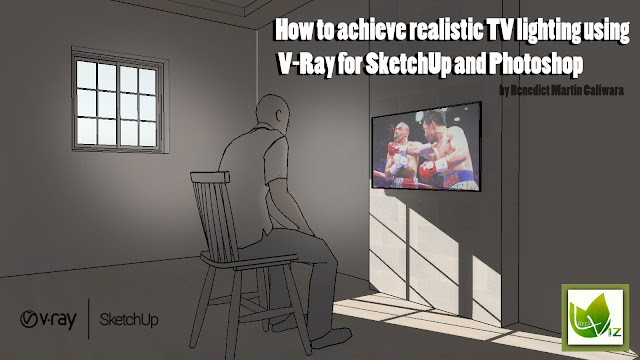
How to achieve realistic TV lighting using V-Ray for SketchUp and Photoshop
The purpose of this tutorial is
to explore the different techniques in visualizing T.V. screen with light
effects using V-Ray for SketchUp and Photoshop. Lighting-up the T.V. screen
using V-Ray for SketchUp requires specific lighting features which enable the
screen to emit lights. These V-Ray lighting features includes (1) V-Ray
rectangular light and (2) emissive light. During the rendering procedure, it is
important to know the application and proper placement of these two V-Ray
lighting features in order produce a clear rendered image of a T.V. screen that
glows and lights the surrounding environment specifically in the dark room
scene. As an alternative, we can use Photoshop in order to create T.V. lighting
effects on screen.
For this tutorial, we will be using the
following 3-D models: (1) Flat T.V.
screen, (2) 3-D people in a sitting position, (3) window and (4) chair. You can
find similar items in 3DWarehouse.
First, create a simple scene
using SketchUp. See the image below for reference. When done, you can proceed
to rendering procedure.
 |
SketchUp Scene (Plan view)
|
 |
Test render using V-Ray for SketchUp
|
METHOD #1: V-Ray Lights (Emissive light + Rectangular light)
 |
STEP 2: Open your V-Ray ‘Material
Editor’, then locate the texture you applied on the T.V. screen. After that, add the ‘Emissive Map
layer’ to your material.
|
 |
Here is the default appearance of
Emissive Light material.
|
 |
Test render with Emissive Light
map layer.
|
 |
STEP 3: Once you have created an
Emissive Map layer, load a bitmap image on ‘Emissive color’ box. This will
enable us to project the image on the T.V. screen with light effects.
|
 |
STEP 4: Under the ‘Emissive
color’ map layer, select the ‘Bitmap’ then load the image on the ‘File’ box.
|
 |
STEP 5: Choose your desire image
for your T.V. screen then click ‘Open’
|
 |
Reference photo (source
material): https://sports.yahoo.com/manny-pacquiao-hands-keith-thurman-his-first-loss-in-thriller-051359771.html
|
 |
Result so far.
|
 |
STEP 7: Adjust the image until it
fits on the T.V. screen. Here, I adjust the size of the image by stretching it along the ‘Green’ and ‘Blue’
axis.
|
 |
STEP 8: Going back to ‘V-Ray
Asset Editor’, adjust the intensity of your Emissive material, based on your
preference.
|
 |
RENDERED T.V. SCENE (INTENSITY
1.0 to 3.0)
|
 |
STEP 10. Go to V-Ray ‘Rectangular
Light’ settings and check the ‘Invisible’. Adjust the light intensity with values
around 60-90. When done, click the ‘Render’ button.
|
 |
FINAL RAW RENDER RESULT (METHOD #1)
|
METHOD #2: Photoshop
For this method, we will be using the same
model scene.
 |
STEP 2: Save the rendered images
including all the render elements.
|
 |
STEP 3: Open all the rendered
images to Photoshop. Place the ‘Total Light’ image above the RGB (Background)
and set the blend mode to ‘Screen’ with 100% opacity.
|
 |
| T.V. Screen Image for Photoshop Reference Photo |
 |
STEP 5: Adjust the image using
the ‘Distort tool’ by going to ‘Edit’ tab> ‘Transform’> ‘Distort’ or
(hold the Ctrl key while adjusting the corner of the image.) When done, hit
‘Enter’.
|
 |
STEP 6: Using the ‘Magic wand
tool’, with up to 50 ‘Tolerance’, select the T.V. screen from
the ‘Material ID’ or ‘Object ID’ layer.
|
 |
STEP 8: Make a copy of T.V.
screen image layer and set the blend mode to ‘Screen’.
|
After a long process of making a basic T.V. lighting effect, let us enhance the rendered image we made so far using Photoshop.
 |
STEP 10: In order to bring a more natural bounce of light projecting from the T.V. screen, we need to apply additional
‘Brightness’ effect with ‘Drop shadow’ on the T.V. model.
|
 |
STEP 11: Click ‘Add Layer’ then
fill the area with white color using the ‘Paint Bucket tool’.
|
 |
STEP 12: Change the scale of the
‘white color’ layer by going to ‘Edit’ tab> ‘Transform’> ‘Perspective’.
|
 |
STEP 13: Select the ‘White color
layer’, then apply the 'Gaussian blur' effect. To do that, go to ‘Filter’> ‘Blur’> ‘Gaussian Blur’ then press Ok. This will
serves as the light ray of the T.V. screen
|
 |
STEP 14: Select the ‘White color' layer and gently erase the excessive part of light rays.
|
 |
FINAL RENDERED IMAGE (METHOD #2)
|
 |
FINAL RENDERED IMAGE (METHOD #1
AND METHOD #2)
|
 |
OTHER RENDERED TV AND COMPUTER
SCREEN (MY ART WORKS)
|
Vray for SketchUp: Emissive Material from Chaos Group
SketchUp V-ray lighting tutorial from SketchUpArtist
BRDF terms from Wikipedia
Thank you for Reading!


vray-for-sketchup-crack
ReplyDelete<a href="https://keygen4u.com/vray-for-sketchup-crack/
How To Achieve Realistic Tv Lighting Using V-Ray For Sketchup And Photoshop >>>>> Download Now
Delete>>>>> Download Full
How To Achieve Realistic Tv Lighting Using V-Ray For Sketchup And Photoshop >>>>> Download LINK
>>>>> Download Now
How To Achieve Realistic Tv Lighting Using V-Ray For Sketchup And Photoshop >>>>> Download Full
>>>>> Download LINK Bx
I love what you've got to say. But maybe you could a little more in the way of content so people could connect with it better. Please also visit my website and tell us what you think . Much thanks to you!
ReplyDeleteSoftware Download
V-Ray SketchUp Crack
DLL Files Fixer Crack
Guitar Pro Crack
Pixellu Smartalbums Crack
Hello, this post gives very interesting information about off-season camping, really I like this information which is so much beneficial to us, keep sharing such kind of information, Thanks for sharing.
ReplyDeleteVray Crack
How To Achieve Realistic Tv Lighting Using V-Ray For Sketchup And Photoshop >>>>> Download Now
ReplyDelete>>>>> Download Full
How To Achieve Realistic Tv Lighting Using V-Ray For Sketchup And Photoshop >>>>> Download LINK
>>>>> Download Now
How To Achieve Realistic Tv Lighting Using V-Ray For Sketchup And Photoshop >>>>> Download Full
>>>>> Download LINK Az