How to Make Bump Materials Using GIMP2
In
photo-realistic rendering for SketchUp, bump mapping is a good technique for
simulating bump and wrinkles, highlighting the depth changes of the geometry
underlying the diffuse texture. Here are few easy steps on how to make your own
bump using GIMP2 (free software).
 |
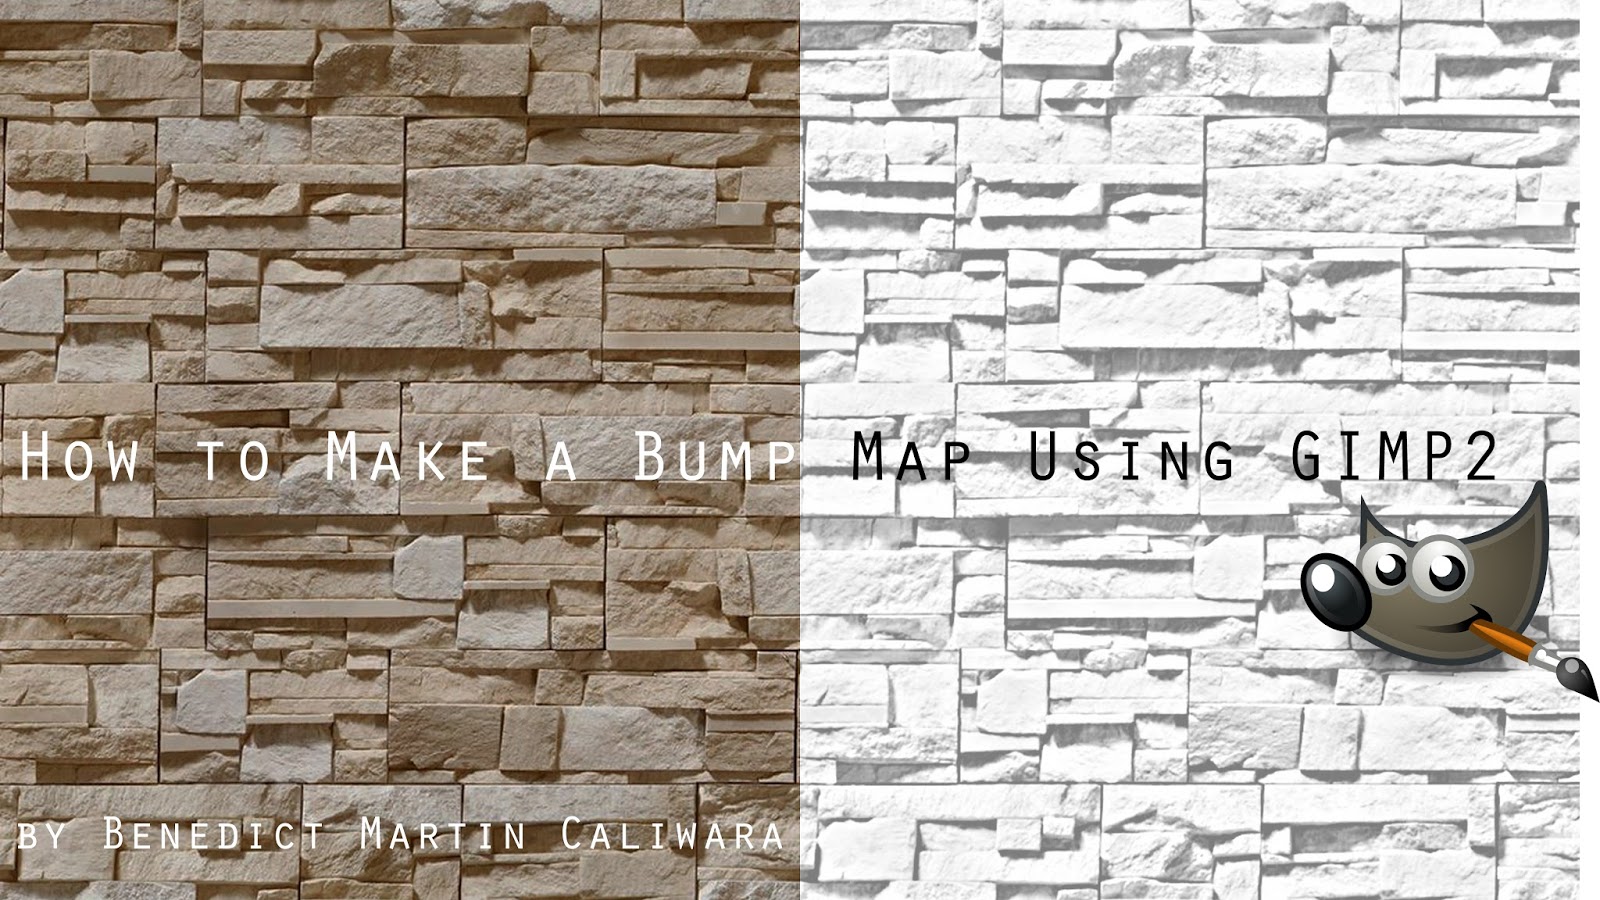
Sample
Stone Wall Texture (Image credit from SketchUp Texture Your Work)
|
 |
STEP 1:
Open your texture image in GIMP2. Click ‘Image’ tab> select ‘Mode’> click
‘Grayscale’
|
 |
STEP 2: Go
to ‘Filters’> select ‘Artistic’> click ‘Photocopy’
|
 |
STEP 3: Adjust
the following value> Click Ok
|
 |
STEP 4: Export
the modified image in JPEG or PNG format
|
 |
FINAL
RESULT: BUMP MAP
|
To see the difference between diffuse (no bump) and diffuse with bump below are some test render results. (Test Render was done using Kerkythea)
 |
Sample
Diffuse and Bump Materials
|
 |
Test Render Output: Diffuse
Map Only
|
 |
Test Render Output: Diffuse
with Bump
|
As an
alternative you can edit your textures online to create different bump materials.
 |
| Here is the Link: Normal Map Onlne |
Thank you!
Thanks
ReplyDeleteFirst of all Thanked to you for sharing this information. But some one explained this in other way on Free Online Photo Editor site. so I'm confuse now, please help me to get assure.
ReplyDelete